If you’re unfamiliar with VBA, then it’s probably a good idea to read this post about How To Use The VBA Code You Find Online before continuing reading and working with the completed workbook. For this code you will need the Microsoft Outlook 16.0 Object Library enabled. In the visual basic editor, go to Tools then References and check the box next to it and press OK button to enable it.
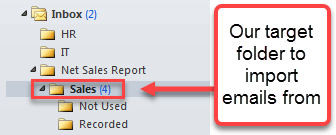
In this example I’m going to be importing from an Outlook folder called Inbox/Net Sales Report/Sales. If you wanted to import from a subfolder of Sales then you would need to append another .Folders(“Subfolder Name”) onto the Set Folder = line of code. I have added named ranges to the workbook as referring to a cell with a named range in VBA rather than the generic cell address such as Range(“A1”) means you can move things around in your workbook without worrying about breaking your code. These are the named ranges the code will use.
From_date – This cell will allow the user to input a From Date so that only emails received (and in our Sales folder) after this date are returned.eMail_subject – This cell contains the Subject column heading. Subjects from emails will be imported just below this cell.eMail_date – This cell contains the Date column heading. Date received from emails will be imported just below this cell.eMail_sender – This cell contains the Sender column heading. Sender information from emails will be imported just below this cell.eMail_text – This cell contains the Email Text column heading. The main text body from emails will be imported just below this cell.
Here is the code.
It’s a pretty simple VBA procedure, but it can be very useful if you have to deal with a lot of similar emails.